
19 Aug Hand Embroidering a T-shirt
Adding a simple embroidery to a baby onesie, a T-shirt, or another item made of stretchy fabric can be quite easy to do, provided you prepare correctly. One of the most significant challenges people face when embroidering on a stretchy T-shirt fabric is that often the design might become distorted when the material is stretched or pulled too tightly.
A stabilizer will solve that problem.
And embroidered embellishment on and a T-shirt, a baby onesie, or anything else can be a considerably large design, or something small and simple. Hand embroidering a T-shirt is the perfect way to create something unique and personal.
Types of stabilizer
You can use a stabilizer with almost all kinds of embroidery, but with clothing, it is better to use a removable stabilizer instead of the type that is designed to stay in place. A stabilizer that is designed to stay in place is called a leave-in. This will keep the back of the stitching feeling soft, and not scratchy itchy on the skin.
There are many kinds of stabilizers designed for embroidering on stretchy T-shirts and other stretchy fabrics. Some are permanent, and others are temporary. Some stabilizers will dissolve in water, and other stabilizers will tear away. There is also a stabilizer that will attach to the fabric with large basting stitches, and there is another that will adhere directly to the material. In general, any of the stabilizers that will work for you. It’s a matter of practice to find out which one you prefer.
The goal with any of these stabilizers is to prevent the fabric from stretching. When you restrict the fabric from stretching, you avoid the embroidery from being distorted once the hoop is removed.
To accomplish this piece, the stabilizer should always be larger than your embroidery design and the hoop that you are using.
It is a good idea to trace or transfer your pattern onto the T-shirt, or another piece of fabric before adding the stabilizer. But this will depend on the type of stabilizing material you will be using.
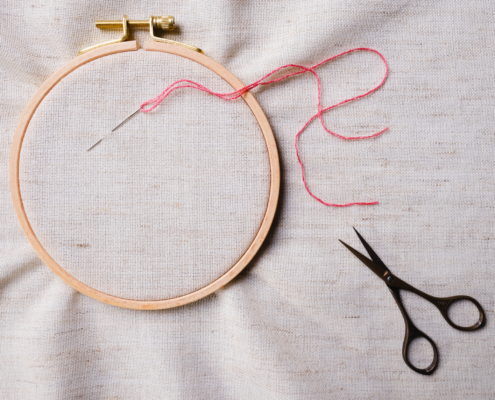
Equipment needed for Hand Embroidering a T-shirt:
- Stabilizer
- Embroidery floss
- Embroidery hoop
- Iron
- Needle round and is preferred

Instructions for Hand Embroidering a T-shirt
Mini stabilizers will be designed to be on the back of the embroidery. So you will start by turning the T-shirt inside out.
- Slide a piece of paper between layers of fabrics that make it easy to create a baste without catching a second T-shirt layer.
- Carefully place the stabilizer in the area that you intend to stitch.
- Make some large basting stitches with a needle and thread to secure the stabilizer to the T-shirt. It is vital to keep this fabric and the stabilizer as smooth as possible. Don’t worry if the stitches go through the area that you will be embroidering; the basting stitches will be removed towards the end.
- Now turn the T-shirt inside out.
Stabilize Fabric with the Press and Stick Material
Press and stick stabilizers will adhere to the surface of your fabric. They can then be used on either the front or the back of the T-shirt. One type has a water-soluble stabilizer, which comes with the appeal of packing. Which means you place these like a sticker. The other kind can be ironed on to the shirt, and then remove later by merely tearing it away.
A removable stabilizer is often a great idea because you can print, transfer, or trace the pattern directly onto the stabilizer.
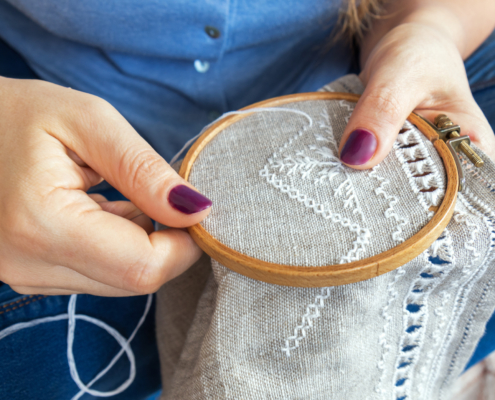
Hoop the Fabric Without Stretching
When placing the outer hoop on the shirt, make sure the shirt is loose underneath.
Then place the inner hoop inside the shirt, and under the area, you will be stitching.
If you spot if you have accidentally stretched or misshapen the fabric, then simply try re-hooping.

How to Stitch on a T-shirt
You will want to use a round-end or a ball-point needle, which will help you avoid pulling or snagging the T-shirt material. Tapestry or counted cross-stitch needles will work well. These are the needles that are most likely to find a way through the knit of fabric without piercing any extra threats.
Like with any other kind of embroidery, you must start and end your T-shirt embroidery well. This is especially important because you do not want any stitching coming on done when it gets washed. Tying knots in the thread will result in pulling and stretching the fabrics, and this will again distort the design. Instead, securely weave in the end, this will keep your embroidery looking beautiful.
Continue to improve it as you usually would be very careful not to pull the stitches too tight the stabilizer will help prevent this, but you should not rely on it solely.
Remove the Stabilizer
If you happen to be using a stabilizer that you pasted onto the tea, carefully remove the basting stitches by snipping the thread and gently removing them.
If you have used a tear-away stabilizer, then tear the material along the edges right up to the embroidery then remove the pieces from the inside of your embroidery design. Be incredibly careful not to disrupt your stitches.
If you have used a water-soluble stabilizer, carefully cut away the excess stabilizer from the edges before so can we embroidery in warm water. Then press the T-shirt between two towels to remove Excess water And hang up to dry.
Finishing your Hand Embroidered T-shirt
Once all your hand embroidery has been completed, it is time to remove any wrinkles. Gently iron your finished embroidery from the backside to smooth out any wrinkles.
And you’re done!